How to Create a Distribution List in Outlook (2026 Guide)
A distribution list (called a “contact group” in classic Outlook, or a “contact list” in the new Outlook and Outlook on the web) lets you email multiple people at once without typing each address individually. Whether you’re coordinating a project team, sending updates to clients, or looping in a department, setting one up takes under a minute.
This guide covers all three Outlook versions you’re likely to encounter: Outlook on the web, the new Outlook desktop app, and classic Outlook for Windows.
Quick Reference
| Action | Outlook on the Web | New Outlook Desktop | Classic Outlook (Windows) |
|---|---|---|---|
| Where to start | People icon → arrow next to New contact → New contact list | People icon → arrow next to New contact → New contact list | People icon → New Contact Group in the ribbon |
| Add members | Type names or email addresses in the creation dialog | Type names or email addresses in the creation dialog | Add Members → From Outlook Contacts, Address Book, or New Email Contact |
| Send to the list | Type the list name in the To field | Type the list name in the To field | Type the group name in the To field |
| Edit the list | Right-click → Edit | Right-click → Edit | Double-click the group → Add Members or Remove Member |
| Delete the list | Right-click → Delete | Right-click → Delete | Right-click → Delete |
| Terminology | Contact list | Contact list | Contact group |
1. Create a Contact List in Outlook on the Web
- Go to outlook.office.com and sign in with your Microsoft account.
- Click the People icon in the left navigation pane.
- On the toolbar, click the dropdown arrow next to New contact.
- Select New contact list.
- Enter a name for the list (e.g., “Design Team” or “Q2 Launch Committee”).
- In the Add members field, type the name or email address of each person you want to include. As you type, Outlook will suggest contacts from your address book — select a suggestion or press Enter to add the address manually.
- Repeat step 6 until all members are added.
- Click Create.
Your new contact list appears under All contact lists in the People section. You can also find it in your default Contacts folder.
2. Create a Contact List in the New Outlook Desktop App
The new Outlook desktop app (the version Microsoft is migrating all Microsoft 365 users to starting April 2026) shares the same contact system as Outlook on the web. The steps are nearly identical.
- Open the new Outlook desktop app.
- Click the People icon in the left sidebar.
- Click the dropdown arrow next to New contact in the toolbar.
- Select New contact list.
- Enter a name for the list.
- Type names or email addresses in the Add members field. Outlook will suggest matches from your contacts and organization directory — select them, or type the full email address and press Enter.
- Click Create.
Because the new Outlook desktop app and Outlook on the web share the same data store, a contact list you create in one will automatically appear in the other.
3. Create a Contact Group in Classic Outlook for Windows
Classic Outlook (the version with the ribbon toolbar and File menu) uses different terminology — it calls these “contact groups” — and the workflow is slightly different.
- Open classic Outlook and click the People icon at the bottom of the navigation pane to open your contacts.
- In the Home tab of the ribbon, click New Contact Group.
- In the Name field at the top of the window, type a descriptive name for the group (e.g., “Marketing EMEA” or “Board of Directors”).
- Click Add Members in the ribbon. A dropdown appears with three options:
- From Outlook Contacts — pick from your personal contact list.
- From Address Book — search your organization’s global address list.
- New Email Contact — type a name and email address for someone not yet in your contacts.
- Select or type the people you want to add, then click OK (or Members → OK if using the Address Book).
- Repeat step 4 to add more members from different sources.
- Click Save & Close.
The contact group now appears in your Contacts list and is available in the To field when composing new emails.
4. Send an Email to a Distribution List
Once your list is created, using it is the same across all Outlook versions.
- Open a new email.
- Click the To field and start typing the name of your contact list or contact group.
- When the list name appears in the autocomplete suggestions, select it. You’ll see the group name appear in the To field (in classic Outlook, a + icon indicates it’s a group).
- Compose your message and click Send.
Every member of the list receives the email. Recipients see the group name in the To field, not the individual addresses — unless they expand it.
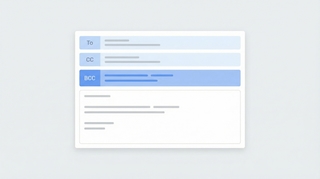
Tip: You can also put a distribution list in the Cc or Bcc fields. Use Bcc if you don’t want recipients to see who else received the message.
5. Edit a Distribution List
Outlook on the Web / New Outlook Desktop
- Click the People icon.
- Select All contact lists in the left panel.
- Find the list you want to edit and right-click it (or select it and click Edit in the ribbon).
- From here you can:
- Rename the list by editing the name field.
- Add members by typing new names or email addresses.
- Remove members by clicking the X next to a person’s name.
- Add a description to help you remember the list’s purpose.
- Click Save.
Classic Outlook for Windows
- Open the People view.
- Find the contact group and double-click it to open it.
- To add members, click Add Members in the ribbon and follow the same process as when you created the group.
- To remove members, select one or more names in the list (hold Ctrl to select multiple) and click Remove Member in the ribbon.
- Click Save & Close.
6. Delete a Distribution List
Deleting a contact list or contact group removes the list itself — it does not delete the individual contacts within it.
Outlook on the web / new Outlook desktop: Go to People → All contact lists, right-click the list, and select Delete.
Classic Outlook for Windows: In the People view, right-click the contact group and select Delete, or select it and press the Delete key.
7. Contact Lists vs. Microsoft 365 Groups
Outlook surfaces two things that look similar but work very differently. Here’s when to use each.
| Contact List / Contact Group | Microsoft 365 Group | |
|---|---|---|
| What it is | A personal list of email addresses stored in your mailbox | A shared workspace with its own mailbox, calendar, file library, and optional Teams channel |
| Who can see it | Only you (unless you export or share it) | Everyone in your organization (public) or invited members (private) |
| Shared mailbox | No — emails are delivered to each member’s inbox individually | Yes — a 50 GB shared mailbox stores all group conversations |
| Shared calendar | No | Yes |
| SharePoint / Teams | No | Yes — comes with a SharePoint site, OneNote notebook, and optional Teams channel |
| Guest access | You can add external email addresses | You can add external guests with access to conversations, files, and notebooks |
| Created by | Any user, in their own contacts | Any user (if allowed by admin), or by an admin in the Microsoft 365 admin center |
| Best for | Quickly emailing a group of people | Ongoing team collaboration with shared resources |
Rule of thumb: If you just need to send the same email to the same group of people regularly, a contact list is all you need. If the group needs a shared inbox, calendar, or files, create a Microsoft 365 Group instead.
To create a Microsoft 365 Group from Outlook: click the People icon, select Groups in the left panel, then click New Group and follow the prompts.
8. Troubleshooting
Contact list not appearing in the To field: Make sure you’re typing the exact name you gave the list. In classic Outlook, also try clicking the To button to open the address book and search for the group name directly.
Can’t find the “New contact list” option: In Outlook on the web and the new desktop app, make sure you click the dropdown arrow next to “New contact,” not the button itself. The button creates a single contact; the arrow reveals the option for a contact list.
Members not receiving emails: Verify the email addresses are correct by editing the list. If a member has a typo in their address, emails will silently fail for that person.
List isn’t syncing between devices: Contact lists created in the new Outlook and Outlook on the web sync automatically. Lists created in classic Outlook sync with Exchange but may not appear in the new Outlook until Microsoft completes its migration tooling. If your classic contact groups are missing in the new Outlook, Microsoft recommends recreating them as contact lists.
Accidentally deleted a list: In Outlook on the web, check your Deleted Items folder — deleted contact lists may be recoverable from there within 30 days.
If you regularly coordinate with groups of people, Carly is an AI assistant that manages your inbox, handles scheduling, and integrates with 200+ apps — so you can spend less time on coordination and more on actual work.
More on Outlook: How to add a signature in Outlook · How to schedule an email in Outlook · How to share your Outlook calendar · How to set up recurring meetings · How to add a calendar to Outlook
Ready to automate your busywork?
Carly schedules, researches, and briefs you—so you can focus on what matters.
Get Carly Today →Or try our Free Group Scheduling Tool or Free Booking Page