How to Mark an Email as Important in Outlook (2026)
Importance in Outlook is a priority marker the sender attaches to a message — High importance shows a red exclamation point, Low importance shows a blue down arrow, and Normal shows nothing. It tells recipients how urgent you consider the email. It’s separate from flagging, which is a follow-up reminder you set on your own copy of a message. This guide covers setting importance on mail you send, highlighting important mail you receive, and when to use a flag instead.
This guide covers every current version: Outlook on the web, the new Outlook for Windows and Mac, and classic Outlook for Windows.
1. Set High or Low Importance on a Message You’re Sending
This is the core feature: marking an outgoing email so the recipient sees it’s a priority.
Classic Outlook for Windows:
- Click New Email to start composing
- Go to the Message or Options tab in the ribbon
- In the Tags group, click High Importance (red exclamation) or Low Importance (blue down arrow)
- The button stays highlighted; send your message normally
Outlook on the web / New Outlook (Windows & Mac):
- Click New mail to compose
- Click the More options menu (the … at the top or bottom of the compose pane)
- Choose Set importance → High or Low
- A marker appears on the message; send as usual
Recipients see the red exclamation (or blue arrow) next to your message in their inbox list and at the top of the open email.
2. Set a Default Importance for All Outgoing Mail
If everything you send should carry a priority marker (rare, but useful for some roles), set a default.
Classic Outlook for Windows:
- Go to File → Options
- Select Mail
- Scroll to the Send messages section
- Set Default Importance level to High, Normal, or Low
- Click OK
Outlook on the web / New Outlook: there’s no global default-importance setting. To apply importance consistently, set it per message, or use a rule (Section 4). Note that marking every email High importance trains recipients to ignore the marker — reserve it for genuinely urgent mail.
3. “Mark as Important” on Mail You Receive
Importance is set by the sender, so you can’t change the importance level of an email already in your inbox. To make a received message stand out for yourself, use one of these instead:
Color category (all versions):
- Right-click the message → Categorize → pick a color (e.g., red “Important”). See how to categorize emails in Outlook.
Flag for follow-up:
- Click the flag icon on the message, or right-click → Flag. This adds it to your To-Do list — see how to flag emails in Outlook.
Pin (web / new Outlook):
- Hover the message and click the pin icon to keep it at the top of your inbox.
Move to Focused (web / new Outlook):
- Right-click → Move to Focused so important senders surface in your priority view.
4. Auto-Mark Important Senders with a Rule
To highlight messages from key people automatically, build a rule that flags or categorizes their mail on arrival.
Outlook on the web / New Outlook:
- Click Settings (gear) → Mail → Rules
- Click Add new rule and name it (e.g., “Flag VIP senders”)
- Condition: From → enter the contact’s address
- Action: Flag the message or Categorize → choose a color
- Click Save
Classic Outlook for Windows:
- Home → Rules → Manage Rules & Alerts → New Rule
- Choose a template like “Flag messages from someone for follow up”
- Set the From condition and the flag/categorize action
- Click Finish
Full walkthrough: how to create rules in Outlook.
5. Importance vs. Flagging vs. Categories
These three are easy to confuse. Here’s what each actually does:
- Importance (High/Low) — a priority marker the sender sets. It travels with the message to the recipient. It does not create a reminder or task.
- Flag — a follow-up marker you set on your copy. It adds the message to your To-Do/Tasks list and can include a due date and reminder. The sender never sees it.
- Category — a color label you apply for visual grouping and filtering. Private to your mailbox.
Use importance to signal urgency to others; use a flag to remind yourself to act; use a category to organize and find mail later.
Quick Reference
| Goal | Tool | Where |
|---|---|---|
| Tell recipient it’s urgent | High importance | Options/More options → High |
| Tell recipient it’s low priority | Low importance | Options/More options → Low |
| All your mail flagged urgent | Default importance | File → Options → Mail (classic only) |
| Highlight a received email | Category / Flag / Pin | Right-click the message |
| Auto-highlight a VIP | Rule (flag or categorize) | Settings → Mail → Rules |
Troubleshooting
There’s no High Importance button when I compose on the web.
It lives in the compose pane’s More options (…) menu under Set importance, not in the main toolbar. Click the … at the top or bottom of the new-message window.
I want to mark an email I received as important but there’s no option.
Importance is set by the sender and can’t be changed on incoming mail. Use a color category, a follow-up flag, or pin the message to highlight it for yourself instead.
My High Importance default isn’t applying in new Outlook.
New Outlook and the web version have no global default-importance setting — only classic Outlook (File → Options → Mail) offers one. Set importance per message or use a rule.
Recipients say my urgent emails don’t stand out.
If you mark everything High importance, the red exclamation loses meaning and some clients de-emphasize it. Reserve High for genuinely urgent messages, and consider a clear subject-line prefix like “[Action needed].”
The red exclamation disappeared after I sent the message.
Importance is preserved on the sent copy and on the recipient’s copy. If yours looks blank, check the message’s open view (top banner) rather than the list, where some views hide the marker column.
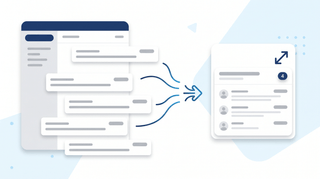
If you’d rather not eyeball every message to decide what’s urgent, Carly is an AI assistant that manages your inbox, handles scheduling, and connects to 200+ apps — surfacing the emails that genuinely need your attention and triaging the rest.
More on Outlook: How to flag emails in Outlook · How to categorize emails in Outlook · How to create rules in Outlook · How to filter emails in Outlook · How to sort emails in Outlook · How to clean up your inbox in Outlook
Ready to automate your busywork?
Carly schedules, researches, and briefs you—so you can focus on what matters.
See what people say
"Before Carly, I relied on a Calendly link, but the whole process felt impersonal and not very professional. Carly changed that by handling all the back-and-forth, so I'm no longer stuck in endless email threads trying to line up schedules.
Now Carly reaches out to candidates, shares my real-time availability, lets them pick a slot, then sends a Zoom link and drops it straight into my calendar. She sends reminders to both of us before each call, which has significantly reduced no-shows and last-minute confusion.
On top of scheduling, Carly acts like a full executive assistant, sending me my schedule the night before so I can prepare for each call. It reminds me of the old x.ai assistant, but Carly is noticeably smarter, faster, and better suited to my healthcare recruitment business."